A DIY hydroponic garden can be built for as little as $10 with a mason jar, or up to $150 for a PVC rail growing a dozen plants at once. The right build depends on your budget, crops, and time. All prices in this guide are estimates based on current market data and are subject to change — always check current listings before buying.
I went through the most widely recommended DIY build guides, community forum reports, and current parts prices from Home Depot and Amazon to rank the builds worth your time — with clean shopping lists and a decision tree you can actually use. I'm a content curator, not a licensed agronomist — everything here is sourced from university extensions and verified community build reports so you can check anything that matters for your setup.
If you're not sure whether hydroponics is right for you yet, start with our indoor hydroponic garden guide for the full system overview — then come back when you're ready to build.
What counts as a DIY hydroponic garden (and what doesn't)
A DIY hydroponic garden is any soil-free growing system you build yourself from common parts — a mason jar, a 5-gallon bucket, a storage tote, or PVC pipe — rather than buying a pre-made unit like an AeroGarden. True DIY systems cost $10–$150 and take 30 minutes to 6 hours to build.
There are three main DIY system categories, and the rest of this guide ranks builds within them:
Passive (no pump): The Kratky method is the most popular passive design. The plant sits in a container of nutrient water, and as the water level drops, an air gap forms around the upper roots — that's how oxygen reaches them. No electricity. Best for herbs and lettuce.
Active DWC (air pump): Deep Water Culture suspends roots in a deep reservoir of aerated nutrient solution. An aquarium air pump runs constantly, pushing oxygen through an air stone. Best for larger plants like tomatoes and peppers.
Circulating NFT (water pump): Nutrient Film Technique uses a sloped 4-inch PVC channel with a thin film of nutrient solution flowing over the roots. A small submersible pump moves water from a reservoir to the high end. Best for 6+ leafy greens at once.
Two things every build needs that aren't in the parts lists below:
- 1 A germinated seedling. Soak a rockwool cube in pH 5.5 water, plant 1–2 seeds, keep warm and moist for 5–7 days until roots appear, then transplant. Lettuce and basil germinate fastest.
- 2 Indoor lighting. A $15 clip-on LED works for a single Kratky jar; a $40–$60 full-spectrum LED panel is needed for a DWC bucket or tote. Outdoor builds in direct sun don't need supplemental light.
What the research says about DIY hydroponic growing
Hydroponic research consistently favours the same crops you'll find in every build below: leafy greens and herbs grow significantly faster in hydroponic systems than in soil and tolerate beginner-level pH and nutrient management better than fruiting crops.
University of Minnesota Extension research on small-scale hydroponics confirms that short-season non-fruiting crops — lettuce, herbs, spinach — are the best candidates for small-scale home hydroponic production. They grow significantly faster than in soil, tolerate the pH and nutrient imprecision that beginners introduce, and succeed in the lower light conditions typical of a home setup. The UMN Extension identifies these crops as ideal precisely because they don't require the high light intensity and longer time to harvest that fruiting plants demand.
The Kratky method has its own academic foundation. Dr. Bernard Kratky at the University of Hawaii demonstrated that three non-circulating hydroponic methods produce yields comparable to active systems for lettuce production — meaning a jar, a net pot, and the right nutrients is genuinely competitive with more complex setups for the crops it's designed for.
The honest caveat: published research uses optimised systems with precisely calibrated nutrients, stable pH, and controlled lighting. A first DIY build won't hit those numbers. Plan for your first grow to be a calibration run rather than a perfect harvest — pH drift, inconsistent lighting, and nutrient strength are the variables you'll be dialling in. The troubleshooting section below covers exactly what to do when something goes wrong.
The best DIY hydroponic builds compared
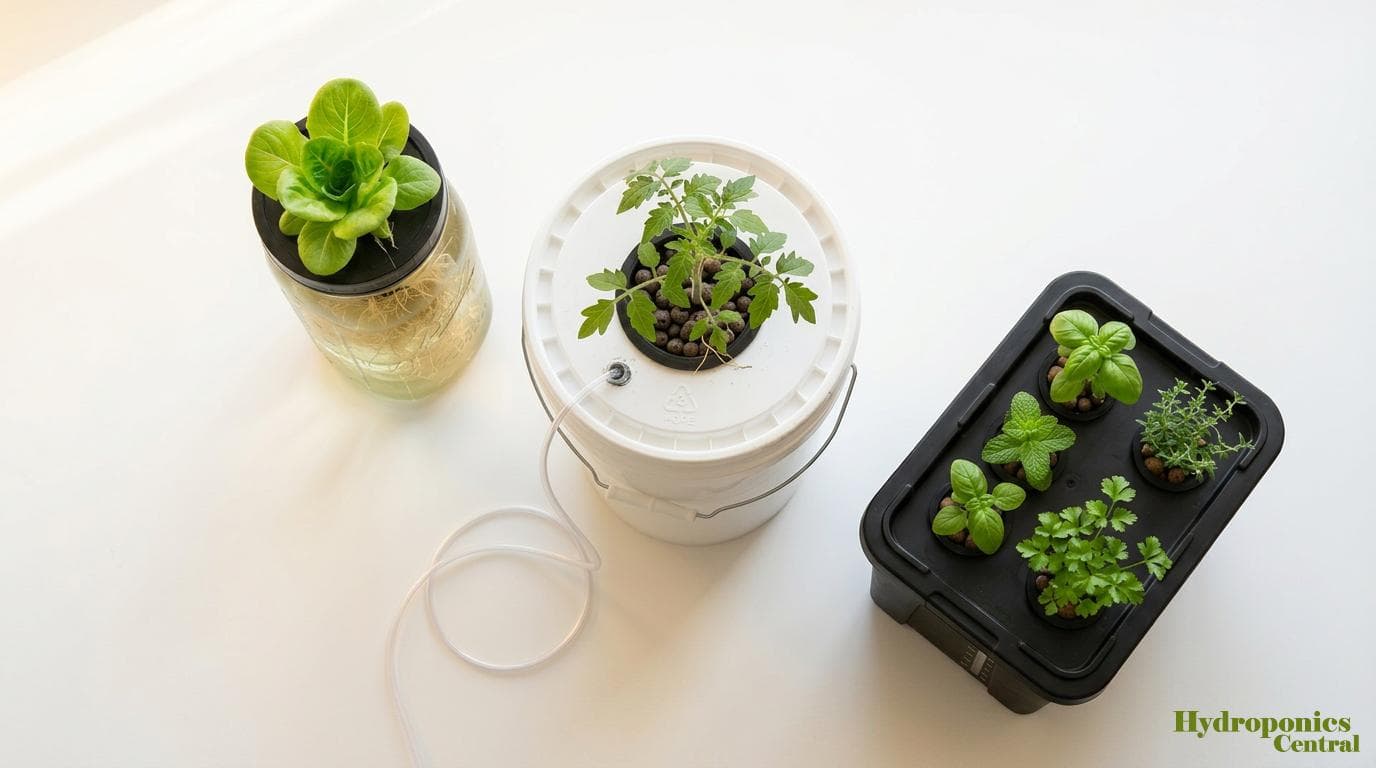
The four most popular DIY hydroponic builds range from a $10 passive mason jar to a $150 PVC channel system — each suited to different crops, budgets, and skill levels. Here's how they compare using current 2026 parts prices.
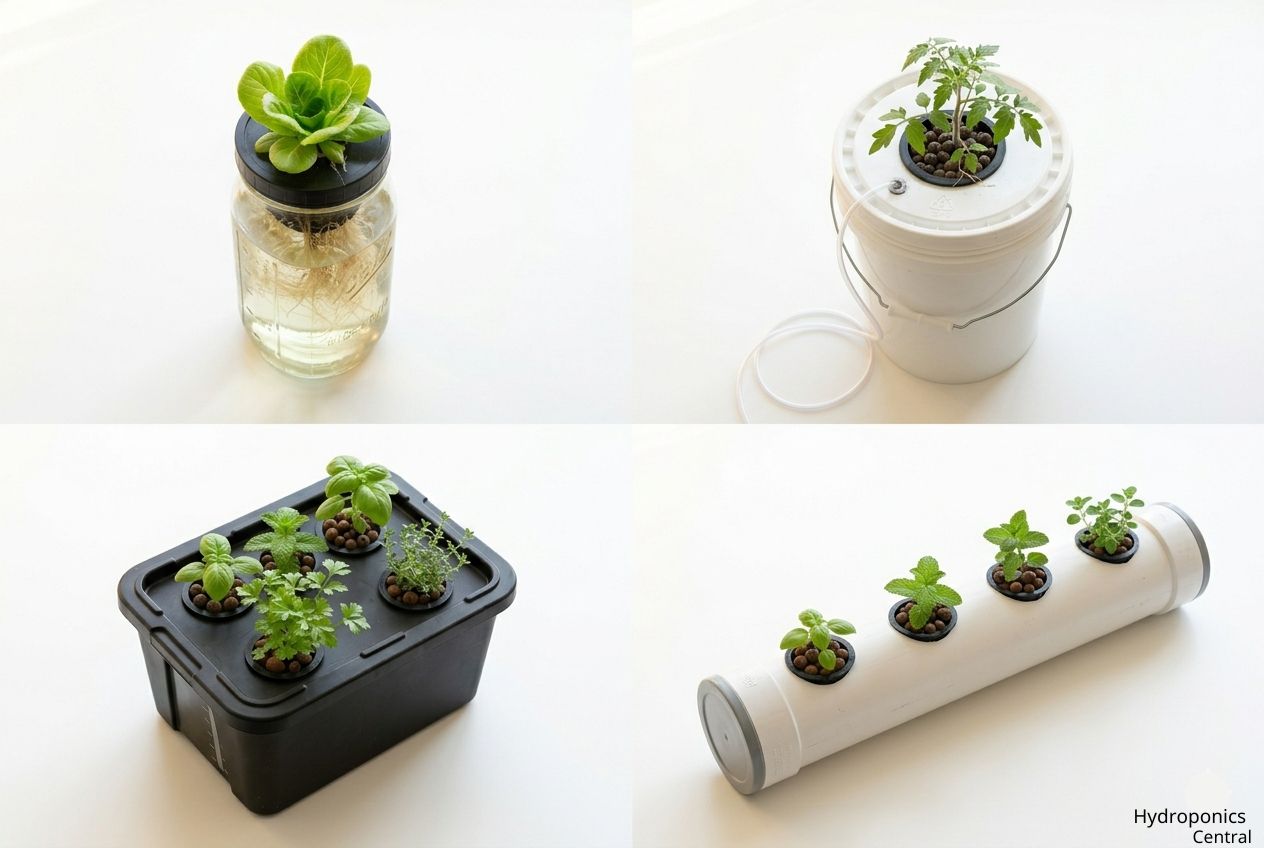
All four DIY hydroponic builds compared by cost, build time, skill level, and best crops — based on 2026 parts prices.
Mason jar Kratky — the cheapest and fastest build. A working system in 30 minutes with $15 in parts. Trade-off: one jar, one plant.
The 5-gallon DWC bucket — the workhorse for larger plants. Deep reservoir plus constant aeration support a single tomato, pepper, or cucumber from seedling to harvest. Needs a $20 air pump running 24/7.
Storage tote DWC — scales the same DWC concept up to 6–12 plants in a shared reservoir. The easiest way to grow herbs or lettuce at quantity.
PVC NFT rail — the most ambitious. A sloped 4-inch PVC channel circulates nutrient solution via a small water pump. Wall-mountable and stackable. Trade-off: build time plus PVC primer, cement, and a hole saw.
Build #1 — Mason jar Kratky (the $15 starter)
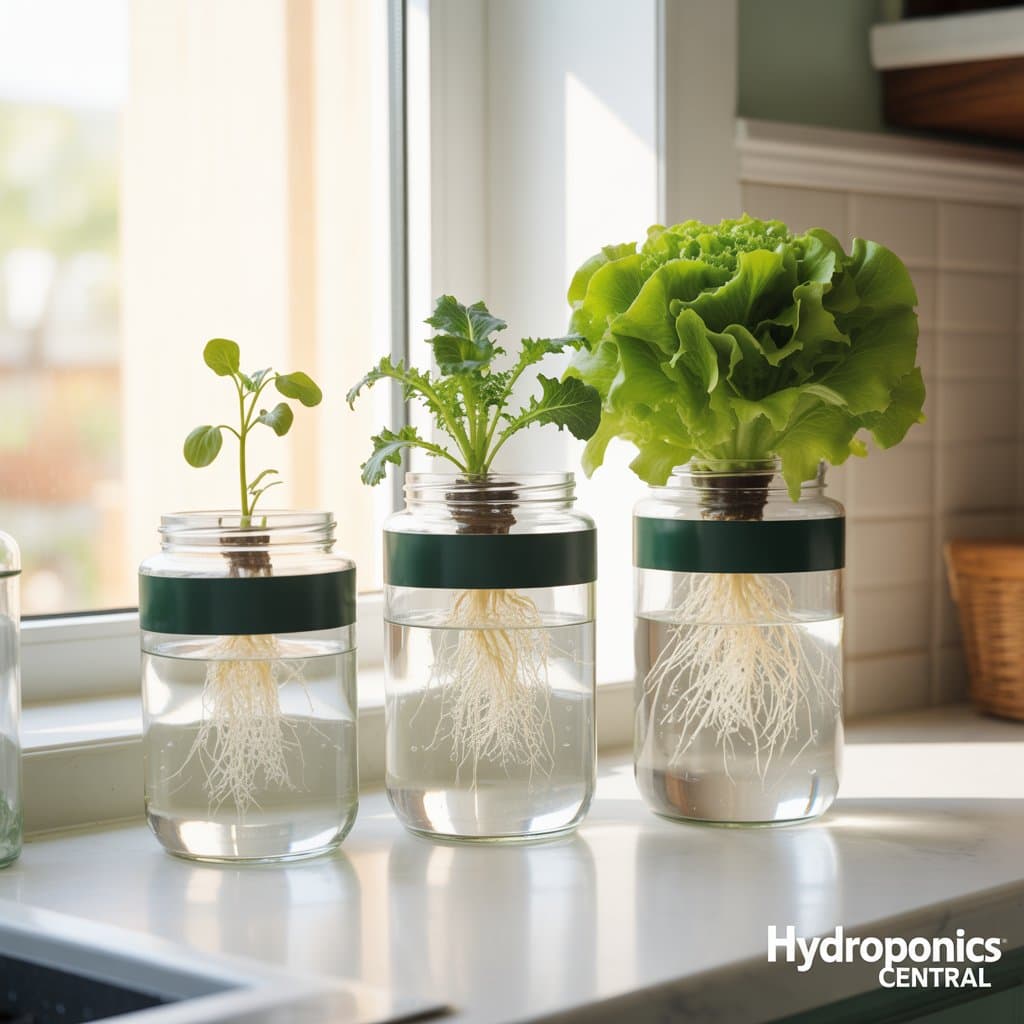
The mason jar Kratky is the best first DIY hydroponic build — about $15 in parts, 30 minutes to assemble, no pump or electricity. Dr. Bernard Kratky at the University of Hawaii developed the non-circulating passive method specifically for low-input growing, meaning the jar system isn't a workaround — it's the design.
Parts list (2026 prices):
- Wide-mouth quart mason jar — Home Depot, ~$2
- One 2-inch net pot — Amazon 20-pack, ~$0.40 each
- Clay pebbles, 1 lb — from a 10 lb Amazon bag (~$20), ~$2 worth per jar
- One rockwool grow plug — Amazon 50-pack, ~$0.20 each
- Hydroponic nutrient solution — General Hydroponics Flora trio, ~$25 (lasts ~1 year)
- Digital pH meter — Amazon, ~$15 (one-time, used across all builds)
- Aluminium foil to block light — from your kitchen drawer
Total per jar: ~$10–$15 in jar-specific parts, plus shared one-time costs (nutrients, pebbles, pH meter ~$60) you'll reuse for any future build.
Build steps:
- 1 Drill or cut a hole in the mason jar lid to fit the 2-inch net pot snugly.
- 2 Transfer your germinated seedling (rockwool plug) into the net pot. Fill around it with clay pebbles to hold it in place.
- 3 Mix nutrient solution at half strength for first-time growers. Fill the jar so the water just touches the bottom of the net pot.
- 4 Wrap the jar in foil to block light from the roots and water.
- 5 Place on a sunny windowsill or 6 inches under a small LED grow light.
The critical Kratky rule: Do not top off the water as the plant grows. The dropping water level is how the plant gets oxygen — as roots stretch down, the upper roots are exposed to air. Topping off defeats the system.
Build #2 — 5-gallon DWC bucket (the $50 workhorse)
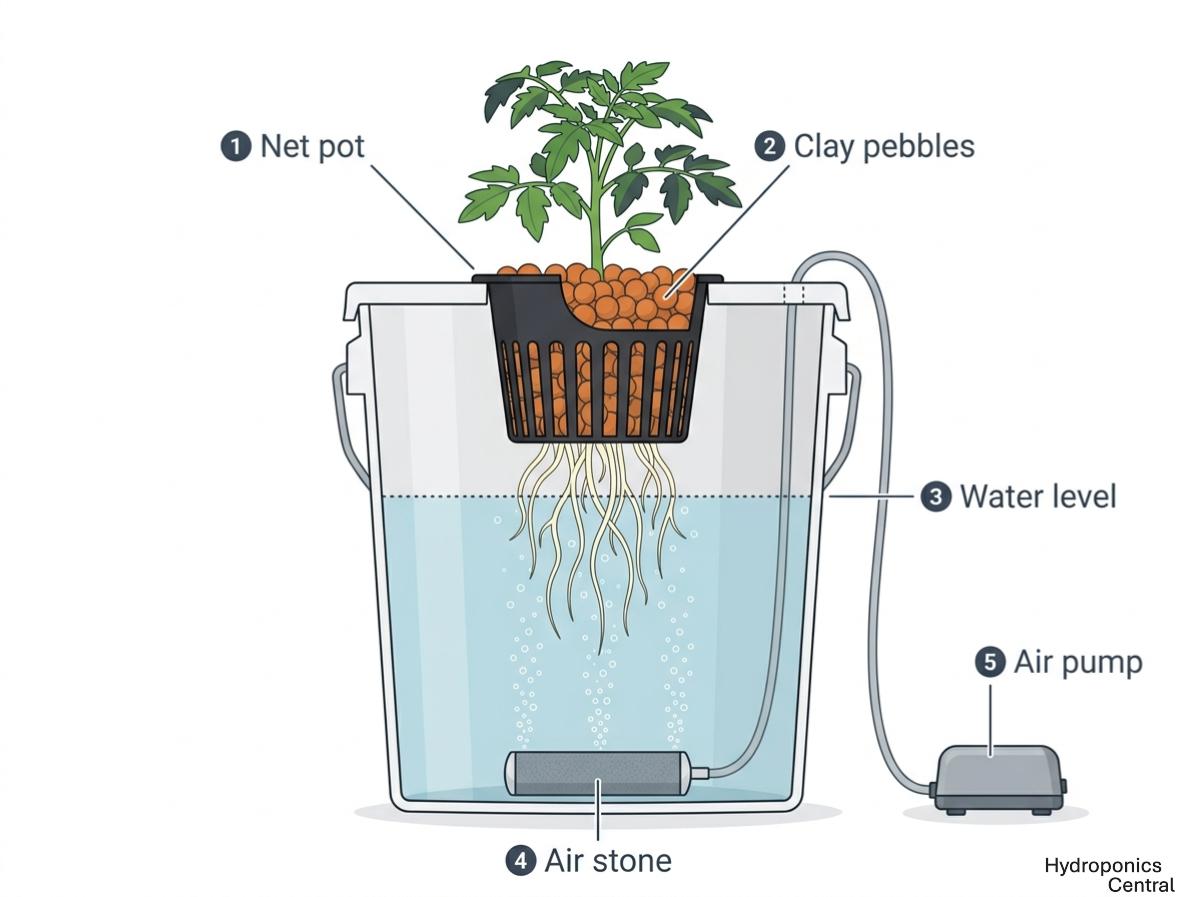
The 5-gallon Deep Water Culture (DWC) bucket holds 4 gallons of nutrient solution. A constantly running air pump pushes oxygen through an air stone — feeding roots more aggressively than passive systems can. The right second build after a Kratky jar, and the best DIY option for tomatoes, peppers, and any large plant that needs a deep root zone and strong aeration.
Parts list (2026 prices):
-
Food-grade 5-gallon bucket with lid — Home Depot orange (
$5) or food-grade blue ($8) - One 6-inch net pot — ~$3
- Aquarium air pump (Active Aqua or Hydrofarm, single outlet) — ~$15–$20
- Air stone + airline tubing — ~$5
- Digital pH meter — ~$15 (if you don't already have one)
- Clay pebbles + nutrient solution — shared with Build #1
Total: ~$50–$75 for first bucket. Additional buckets only need a bucket, net pot, and extra air stone — about $15 each since the pump and consumables are shared.
Tools needed: Drill, 6-inch hole saw, scissors
Build steps:
- 1 Use a 6-inch hole saw on the bucket lid to cut a hole that fits the net pot. Drill a small hole on the side of the lid for the airline tubing.
- 2 Run the airline from the air pump (sitting outside the bucket) through the small hole and connect it to the air stone. Place the air stone at the bottom.
- 3 Fill with 4 gallons of water mixed with nutrient solution. Test pH and adjust to 5.5–6.5 if needed.
- 4 Seat the net pot in the lid hole, fill with clay pebbles, and add your transplanted seedling. The water level should just touch the bottom of the net pot.
- 5 Plug in the air pump — bubbles should stream constantly from the air stone.
Key difference from Kratky: Maintain the water level. Top off as the plant drinks it down — once or twice a week for a mature tomato. The air pump provides oxygen instead of the dropping water level.
Build #3 — Storage tote DWC or PVC NFT rail (the $120 scale-up)
The storage tote DWC and PVC NFT rail are the two best DIY scale-up builds for growing 6–12 plants at once — both in the $80–$150 range, with different trade-offs depending on your space and comfort with PVC work.
Option A: Storage tote DWC
A 28-quart opaque black storage tote becomes a shared reservoir for 6–8 plants, aerated by a single larger air pump — the simpler of the two scale-up options.
Parts list (2026 prices):
- 28-quart black storage tote with lid (must be opaque) — $12–$18
- 6–8 2-inch net pots — Amazon 20-pack, ~$8
- Aquarium air pump (higher flow rate) — ~$20
- 2 air stones + airline tubing — ~$10
- Clay pebbles + nutrient solution + pH meter — shared with Build #1
Tote-specific cost: ~$40–$56. First-time total including shared consumables: ~$80–$120.
Tools needed: Drill, 2-inch hole saw
If your tote isn't opaque, paint the outside black — light penetration causes algae growth that suffocates roots.
Option B: PVC NFT rail
A 4-inch PVC channel sits at a slight slope with holes drilled along the top for net pots. A small submersible pump in a reservoir bucket pushes nutrient solution to the high end; gravity returns it. Unlike DWC where roots sit in deep water, NFT runs a thin film of nutrient water continuously over the roots — more oxygen, but a pump failure can kill plants within hours.
Parts list (2026 prices):
- 10 ft of 4-inch PVC pipe — $25–$35
- 2 4-inch PVC end caps — ~$8
- 5-gallon bucket reservoir — $5
- Submersible water pump (80–150 GPH) — $15–$25
- 1/2-inch vinyl tubing — $5
- 6–8 2-inch net pots — ~$8
- PVC primer + cement — ~$10
- Clay pebbles + nutrient solution + pH meter — shared with Build #1
Rail-specific cost: ~$76–$96. First-time total including shared consumables: ~$100–$150.
Tools needed: Drill, 2-inch hole saw, hacksaw or PVC cutter, level
Which to choose: Storage tote DWC for the simpler build and reservoir depth. PVC NFT rail for a wall-mounted system if you're comfortable with PVC cement. Both grow the same crops well.
For complete step-by-step photos, a full PVC NFT build walkthrough on Family Handyman and a detailed bubble bucket build on NoSoilSolutions are the best visual references for either option.
Which DIY hydroponic system should you build first?
Most first-time builders should start with the mason jar Kratky — it costs $15, takes 30 minutes, and requires no prior experience. From there, your crop goals and available space determine which build makes sense next.
Budget under $20, want to test the concept first? Build the mason jar Kratky. Total cost $10–$15. Harvest lettuce or basil in 3–4 weeks and decide whether to scale up. The right answer for the vast majority of first-time builders.
Want to grow tomatoes, peppers, or cucumbers? Build the 5-gallon DWC bucket. These plants need deep reservoirs and strong oxygen delivery, which the bucket provides better than any other DIY option.
Want fresh herbs and lettuce as a regular habit? Build the storage tote DWC. It produces 6–8 plants' worth of harvest at the same time — enough for actual cooking — and the shared reservoir is easier to maintain than 8 separate jars.
Want vertical or wall-mounted growing? Build the PVC NFT rail. The slope lets you stack channels or mount on a wall.
No tools and don't want to buy any? Start with the mason jar Kratky. The only tool required is a drill (borrow one) to cut the lid hole. For what to grow in your jars, see our hydroponic herb garden guide for the full herb-by-herb growing data.
Common beginner mistakes (and how to fix them)
Most DIY hydroponic failures come down to the same four issues: pH drift, light leaks, overfeeding, and — in NFT builds specifically — pump failure. Knowing the fix before you see the symptom saves at least one failed grow.
Yellowing leaves mid-grow
Yellowing leaves in a DIY hydroponic system almost always signal pH drift outside 5.5–6.5, not a nutrient deficiency. When pH rises above 6.5, nutrients become chemically unavailable to roots even if they're in the water. Test pH before adding more nutrients — overfeeding on top of a pH problem makes it worse. Adjust with pH Up or Down to 5.5–6.5, wait 30 minutes, and retest before resuming.
Green water or slimy brown roots
Green water or slimy roots mean algae has reached the nutrient reservoir, almost always because light is penetrating the container. Algae competes with roots for oxygen and clogs tubing in active systems. The fix: wrap every transparent surface in black tape or aluminium foil — for mason jars, wrapping is mandatory, not optional. Replace the reservoir completely; algae doesn't stop on its own.
Plants wilting suddenly in the PVC NFT rail
Sudden wilting in a PVC NFT rail almost always means pump failure — NFT roots have no moisture reserve and can dry out within hours without the continuous nutrient film. Check the pump daily for the first week. Keep a backup pump on hand if you can. If you can't check daily, start with a DWC build instead; the deep reservoir gives you a buffer of several days before roots are at risk.
Nutrient burn (brown crispy leaf tips)
Nutrient burn — brown, crispy leaf tips — means the nutrient solution is too concentrated for the plant's current stage. Beginners consistently mix too strong. Dilute to half the recommended dose, do a full water change, and restart at the lower concentration. Less is almost always better than more when starting out.
No growth after two weeks
No visible growth after two weeks almost always means insufficient light, not a nutrient problem. A south-facing window in winter provides a fraction of the intensity needed. Add a clip-on LED grow light ($15 for a single jar, $40–$60 panel for a bucket or tote) and set it to run 14–16 hours on a timer.
My take as a curator
The mason jar Kratky is the right first build for almost everyone. $15 in parts, 30 minutes of build time, and a lettuce harvest in three to four weeks. That first harvest tells you whether you want to go further — and it costs almost nothing to find out.
If you try the Kratky jar and want more, the 5-gallon DWC bucket is the right second step. It handles tomatoes and peppers better than any other DIY option. A single plant paying off in produce over a full growing season is a realistic outcome once your pH management is dialled in.
The storage tote DWC and PVC NFT rail are solid scale-up options — but I'd only build them after successfully harvesting from a simpler setup. Both require consistent pH management, and the NFT rail makes pump reliability critical — if it stops, twelve plants are at risk within hours.
University of Minnesota Extension research on small-scale hydroponics consistently points toward leafy greens and herbs as the crops where DIY hydroponic systems deliver the best results relative to effort. That's not just because they're easier — it's because the crop cycles are short enough that you get real feedback quickly and can adjust before committing to a longer grow.
Who this isn't for: anyone who won't check pH weekly. That's the one requirement that can't be skipped regardless of which system you build. Outside of that, DIY hydroponics is genuinely accessible — most of these builds work on the first attempt when you follow the parts lists and keep pH in range.
Join 1,000+ growers getting one curated hydroponic tip every week — subscribe to the Hydroponics Central newsletter. Free, no spam.
Key Takeaways
Quick reference summary
- 1DIY hydroponic gardens range from $10 (mason jar Kratky) to $150 (PVC NFT rail) — match your build to your budget and crops, not the most impressive-looking option.
- 2The mason jar Kratky is the best first build for absolute beginners — $15 total, 30 minutes, no pump, lettuce harvest in 3–4 weeks.
- 3The 5-gallon DWC bucket ($50–$75) is the best DIY option for tomatoes and peppers — the deep aerated reservoir supports larger root systems better than any passive or tote alternative.
- 4Storage tote DWC ($80–$120) and PVC NFT rails ($100–$150) scale to 6–12 plants at once — the right next step after a successful single-plant build.
- 5pH drift is the number one reason DIY hydroponic builds fail — a $15 digital pH meter and a target range of 5.5–6.5 prevent the majority of beginner crop losses.
- 6University of Minnesota Extension research confirms short-season non-fruiting crops — lettuce, herbs, spinach — outperform fruiting crops in small-scale DIY hydroponic setups and are the right starting point for any first build.
Frequently Asked Questions
Common questions from our readers
Written by
Carl — Hydroponics CuratorI research hydroponics so you don't have to — going through university studies, extension programs, and grower communities to find what actually works for home growers.
I'm a content curator and researcher, not a licensed agronomist or commercial grower. Everything published here is sourced from credible third-party research, which is always linked inline. When in doubt, consult your local agricultural extension office. Learn more about how I research →
Found this helpful? Share it!